
How to get your Namecheap private email to work with Vercel DNS

- Published on
- /3 mins read/---
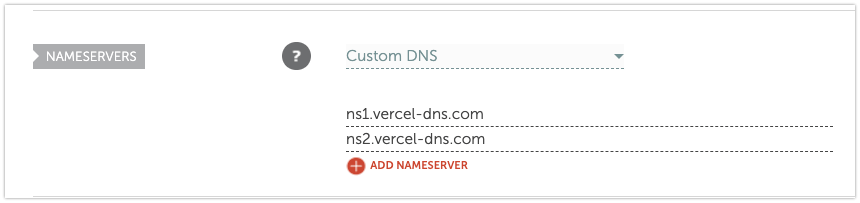
I have own a Namecheap domain for my personal website at leohuynh.dev and using Vercel to manage my website deployments. In my case, I have to config my domain nameservers to point to Vercel's DNS servers. The configuration on Namecheap is as follows:
If you use Google Admin Toolbox to check, then the result should look like this

Now I've just bought a private email from Namecheap and don't know how to configure it to work with Vercel DNS. Namecheap has provided a guide on how to do it, but it's not working for me. So if you have the same problem, here's how to do it.
Get DNS records from Namecheap
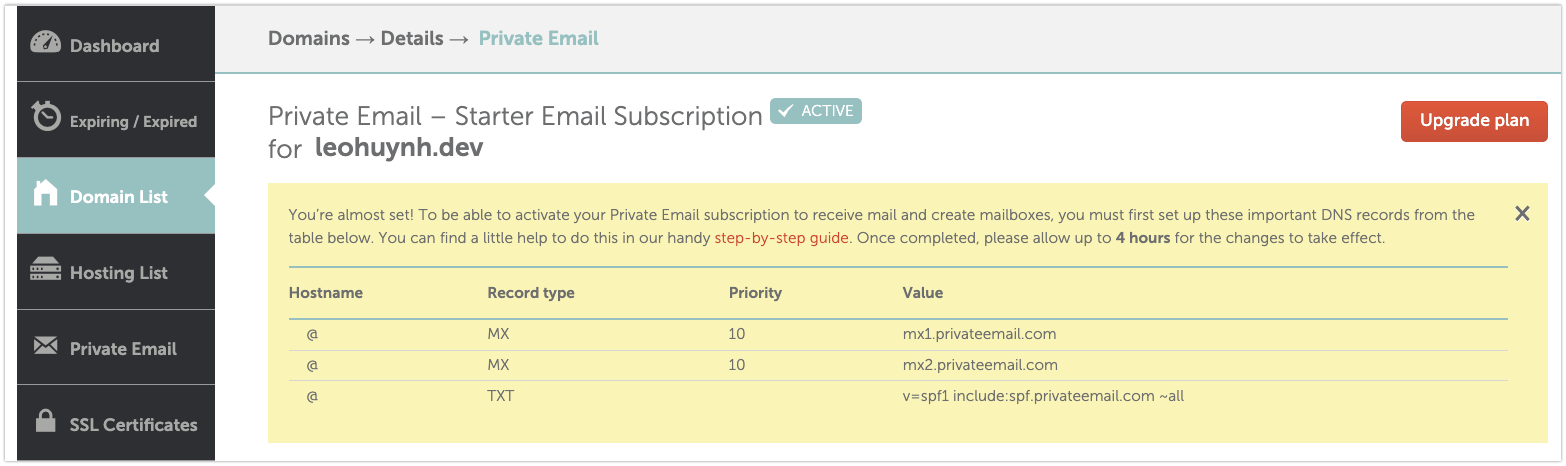
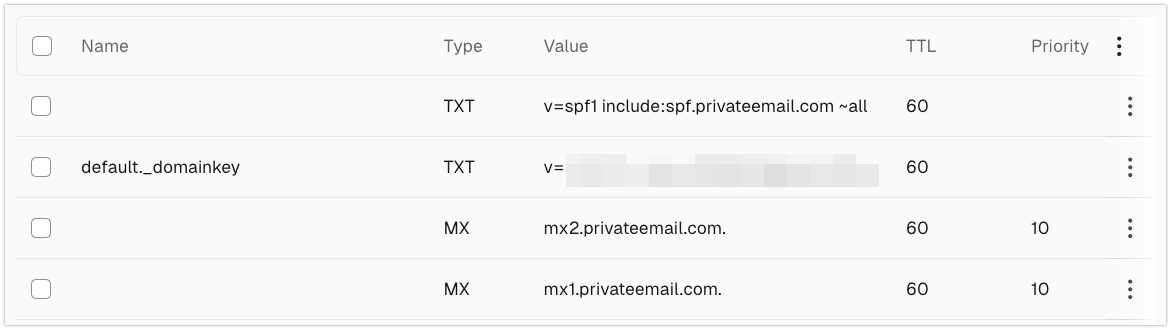
Namecheap will provide you a list of essential DNS records that you need to configure. You can find it under Account / Dashboard / Private Email panel:
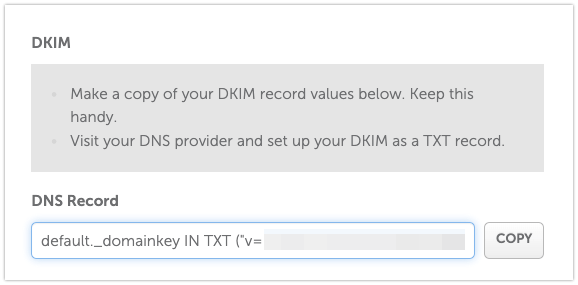
In addition to those, you also need a record for DKIM (DomainKeys Identified Mail). Scroll to the Email Security section and click Add DKIM record (or Show DKIM to see the existing records).
That's all the DNS records (4 in total) you need to configure.
Add DNS records to Vercel
Login to your Vercel account and navigate to Domains page. Your managed domains should be listed there.

Click on the domain you want to add DNS records, and on the first section, you will see a form to add your DNS records here:
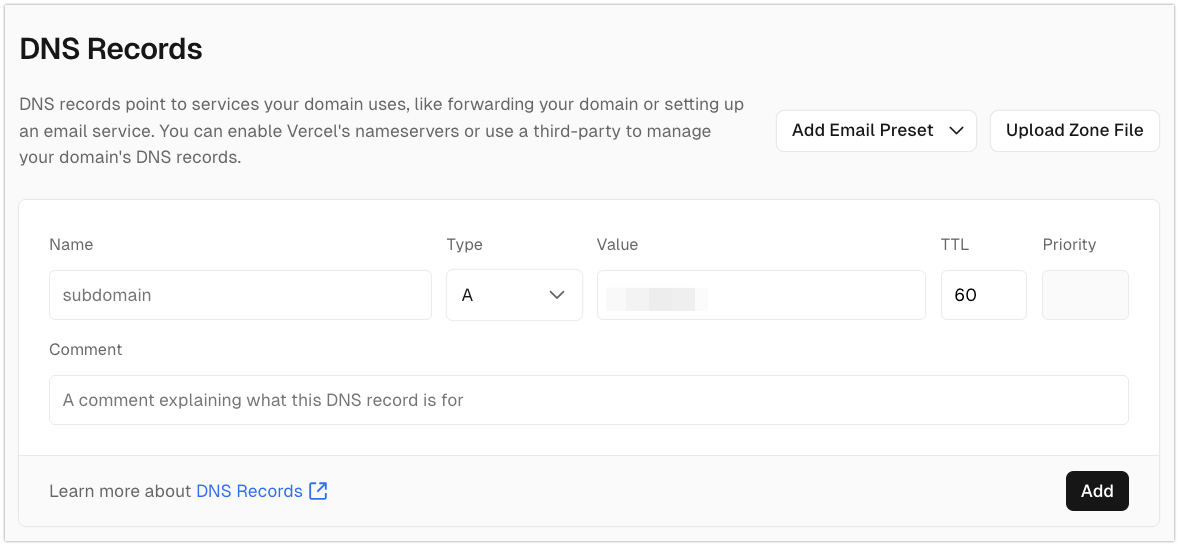
Now add all the 4 DNS records you got from Namecheap here. Please keep in my that for the record for DKIM, the Name should be default._domainkey, and the Value is this part of the record:
default._domainkey IN TXT ("<DKIM_VALUE>");After you've added all the DNS records, they should be listed in the table right below the form:
That's it! Namecheap said that you need to wait for 1-2 hours for the DNS records to propagate, but it should be done in a few minutes.
Now you can try send a mail to your private email address and see if it works by logging into your account through Webmail. You should see the mails in your inbox.
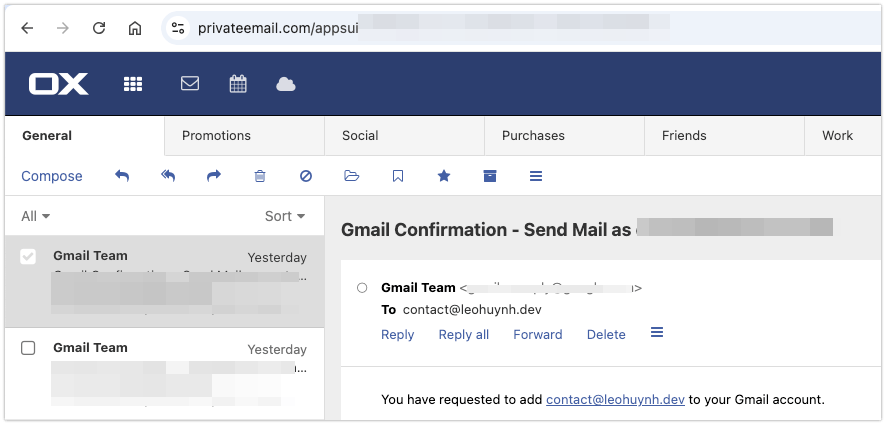
Bonus: Setting up Gmail as your Email Client
You might notice that the Private Email UI is not very user-friendly. So I would highly recommend you to set up Gmail as your email client to make it easier to manage your emails. Compose your emails, send them, and check them in your Gmail inbox would be much more convenient since you must be more familiar with Gmail.
Namecheap has provided a detailed guide on how to do it. You can just follow the steps and you should be good to go.
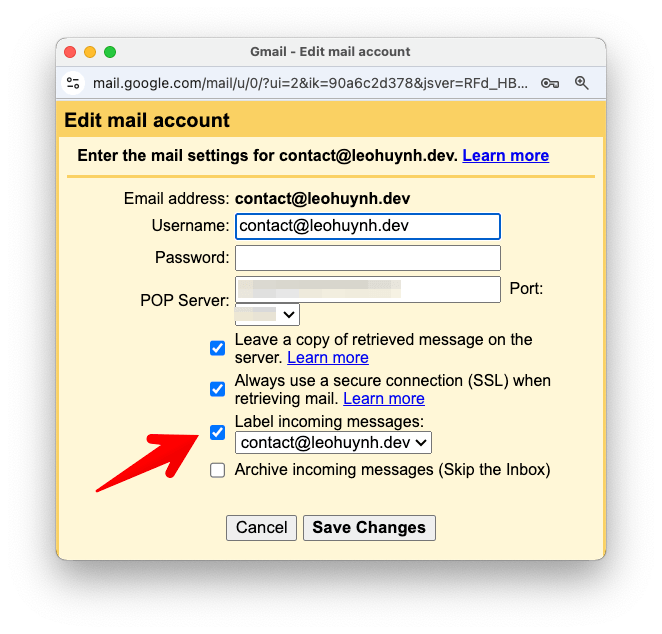
One thing to note is that you should tick the "Label incoming messages" checkbox in the Email Settings step to make it easier to manage your emails.
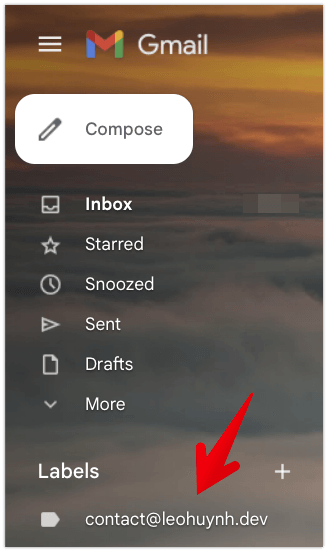
Your mails should be fetched automatically and you can find them under the Labels section in your Gmail inbox.
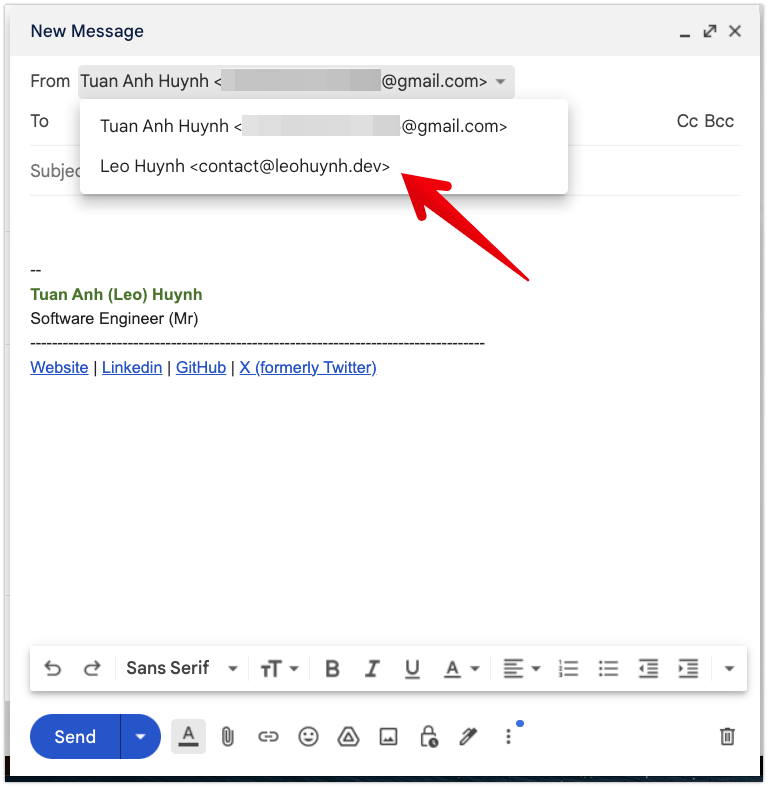
When composing your emails, make sure to select the correct email address from the From field.
Happy emailing!