[Part 1] Deploy and configure your website on Namecheap in the simplest way
- Published on
- /5 mins read/---
I’ve always wanted to have my own personal site, but due to laziness lack of time, I only got to work on it recently while staying at home during the quarantine.
In this post, I’ll guide you on how to set up and configure a domain and web hosting that you purchased on Namecheap (assuming you already have your own source code )
Why this tutorial?
Even though Namecheap has a detailed tutorial on building a website from scratch, swimming through a sea of documentation isn’t that easy.

So, I wrote this tutorial to share what I learned and did in 2 days to remind myself if I forget in the future help you set up your site faster .
What do you need for a complete site?
At first, I thought I only needed to buy a domain and push my code there. But that’s not enough; the 3 basics to run a website are: domain name, hosting, and platform
- Domain name : This is your website address, e.g., pondhub.com, leohuynh.dev ... Think of it like your home address, making it easier to find than using an IP address.
- Hosting : This is where all your website’s data and information are stored.
-- Web hosting, in simple terms, is a remote hard drive connected to your computer via (you guessed it) the Internet.
If the domain is your home address, then hosting is your actual house.
- Platform : These are the tools to build your website, with the source code being the main product.
=> You need to buy both domain and hosting for a complete site.
I decided to buy both on Namecheap due to lack of experience for easy configuration and support from their team
Go to https://www.namecheap.com/domains/ (make sure to create an account first), search for a domain, click Add To Cart. Namecheap will suggest buying Web Hosting and PositiveSSL (which is for securing your site—more on that below).
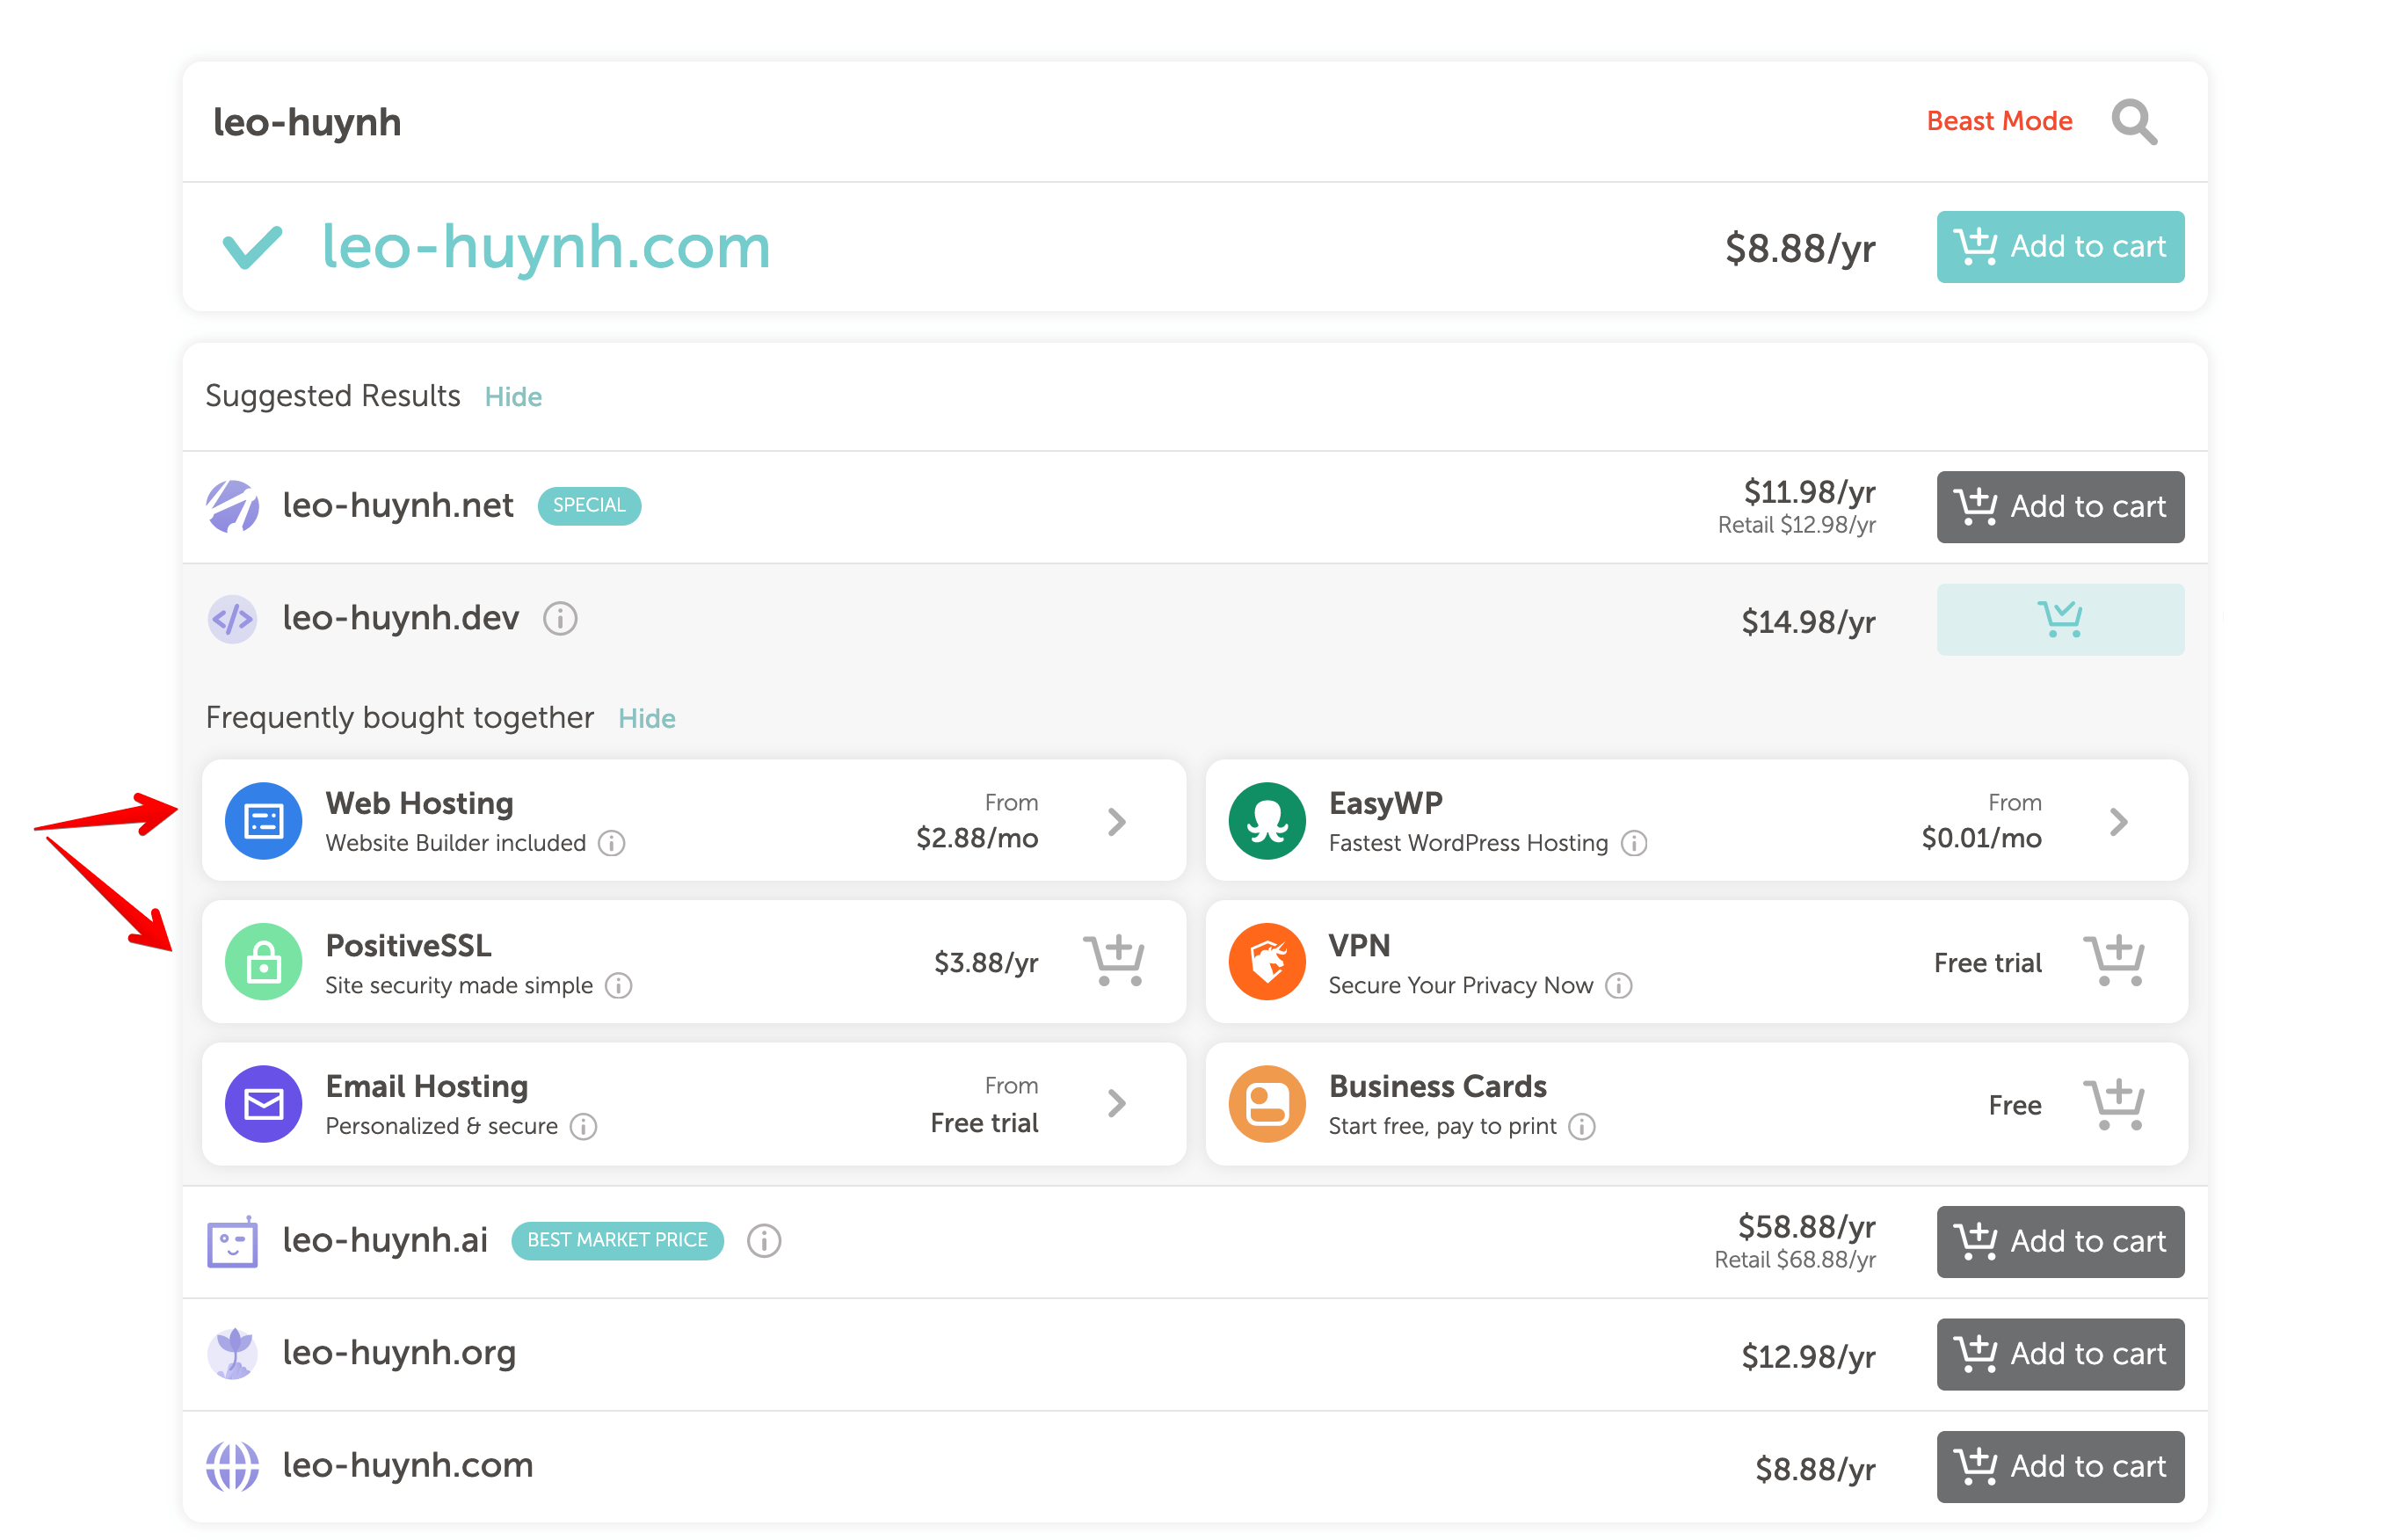
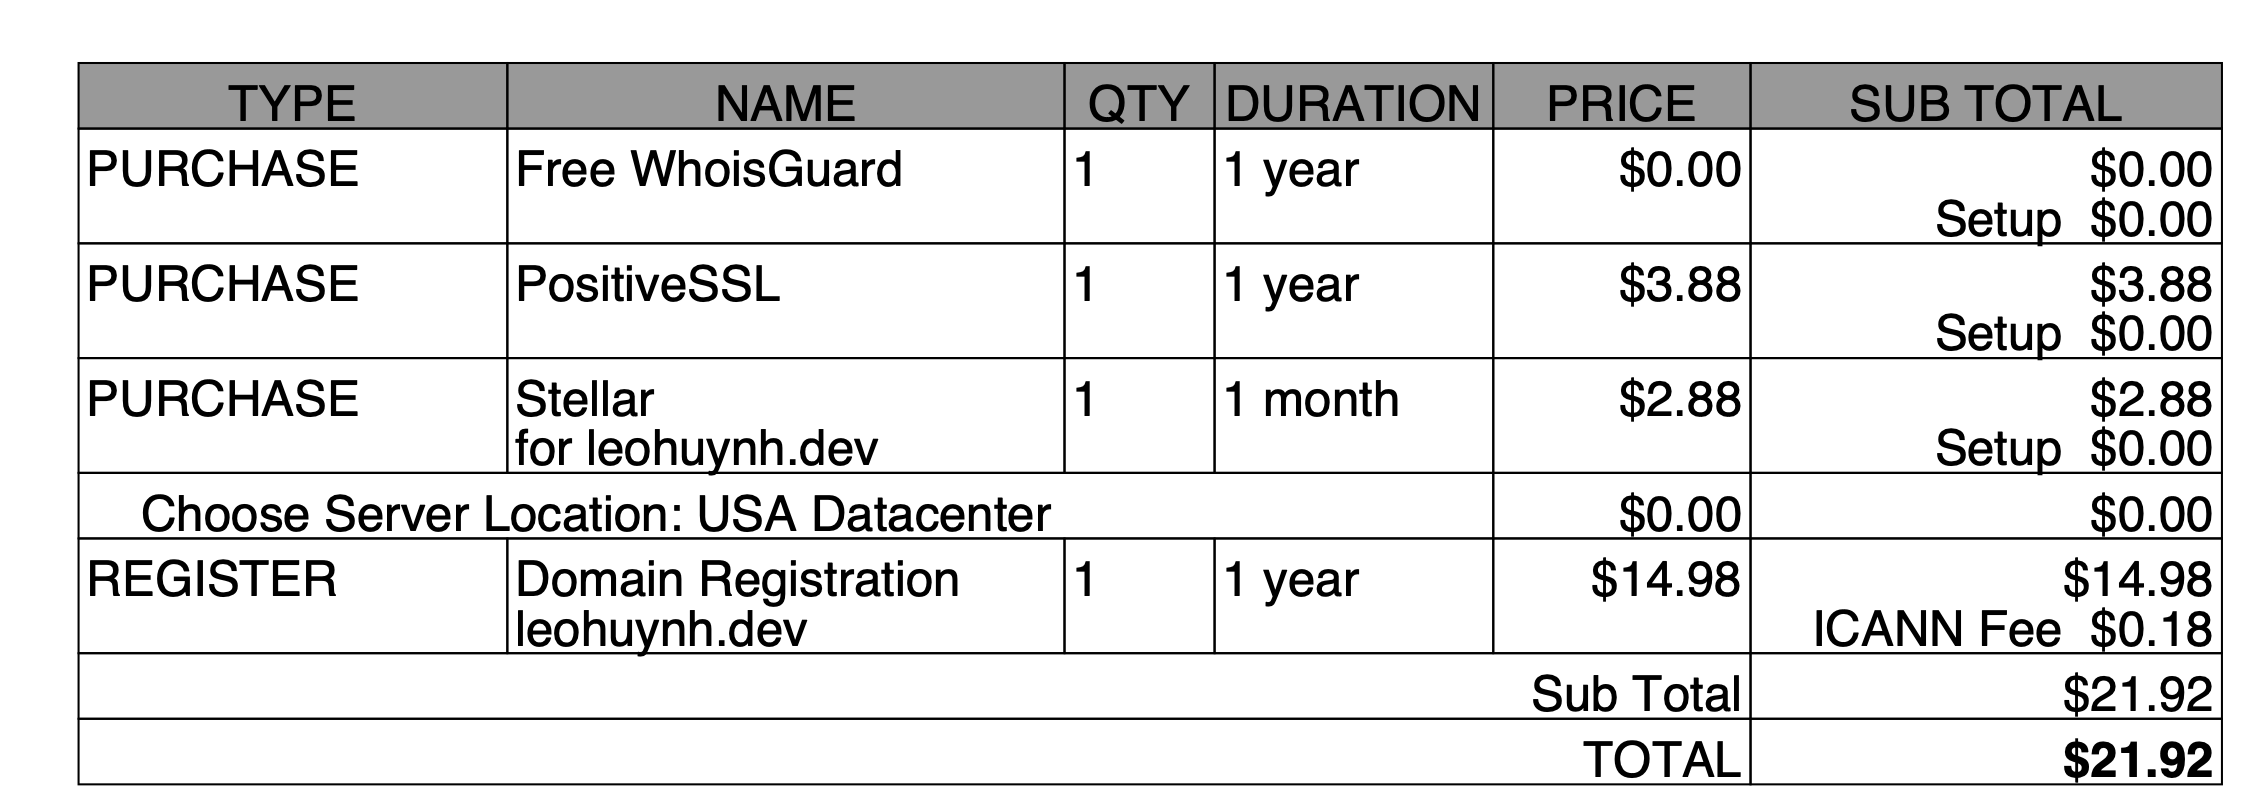
Buying on Namecheap is pretty straightforward. Just provide the required information, pay up and you’re done.
How to connect domain and hosting?
Your house and address are obviously in one place, so why connect them ?
The simple reason is that a house address (Web hosting) is actually a sequence of numbers (IP Address, e.g., 127.0.0.1). You need to go to that address to access the website.
=> You need to connect the domain name to hosting so people can get to the right place using an easy-to-remember address.
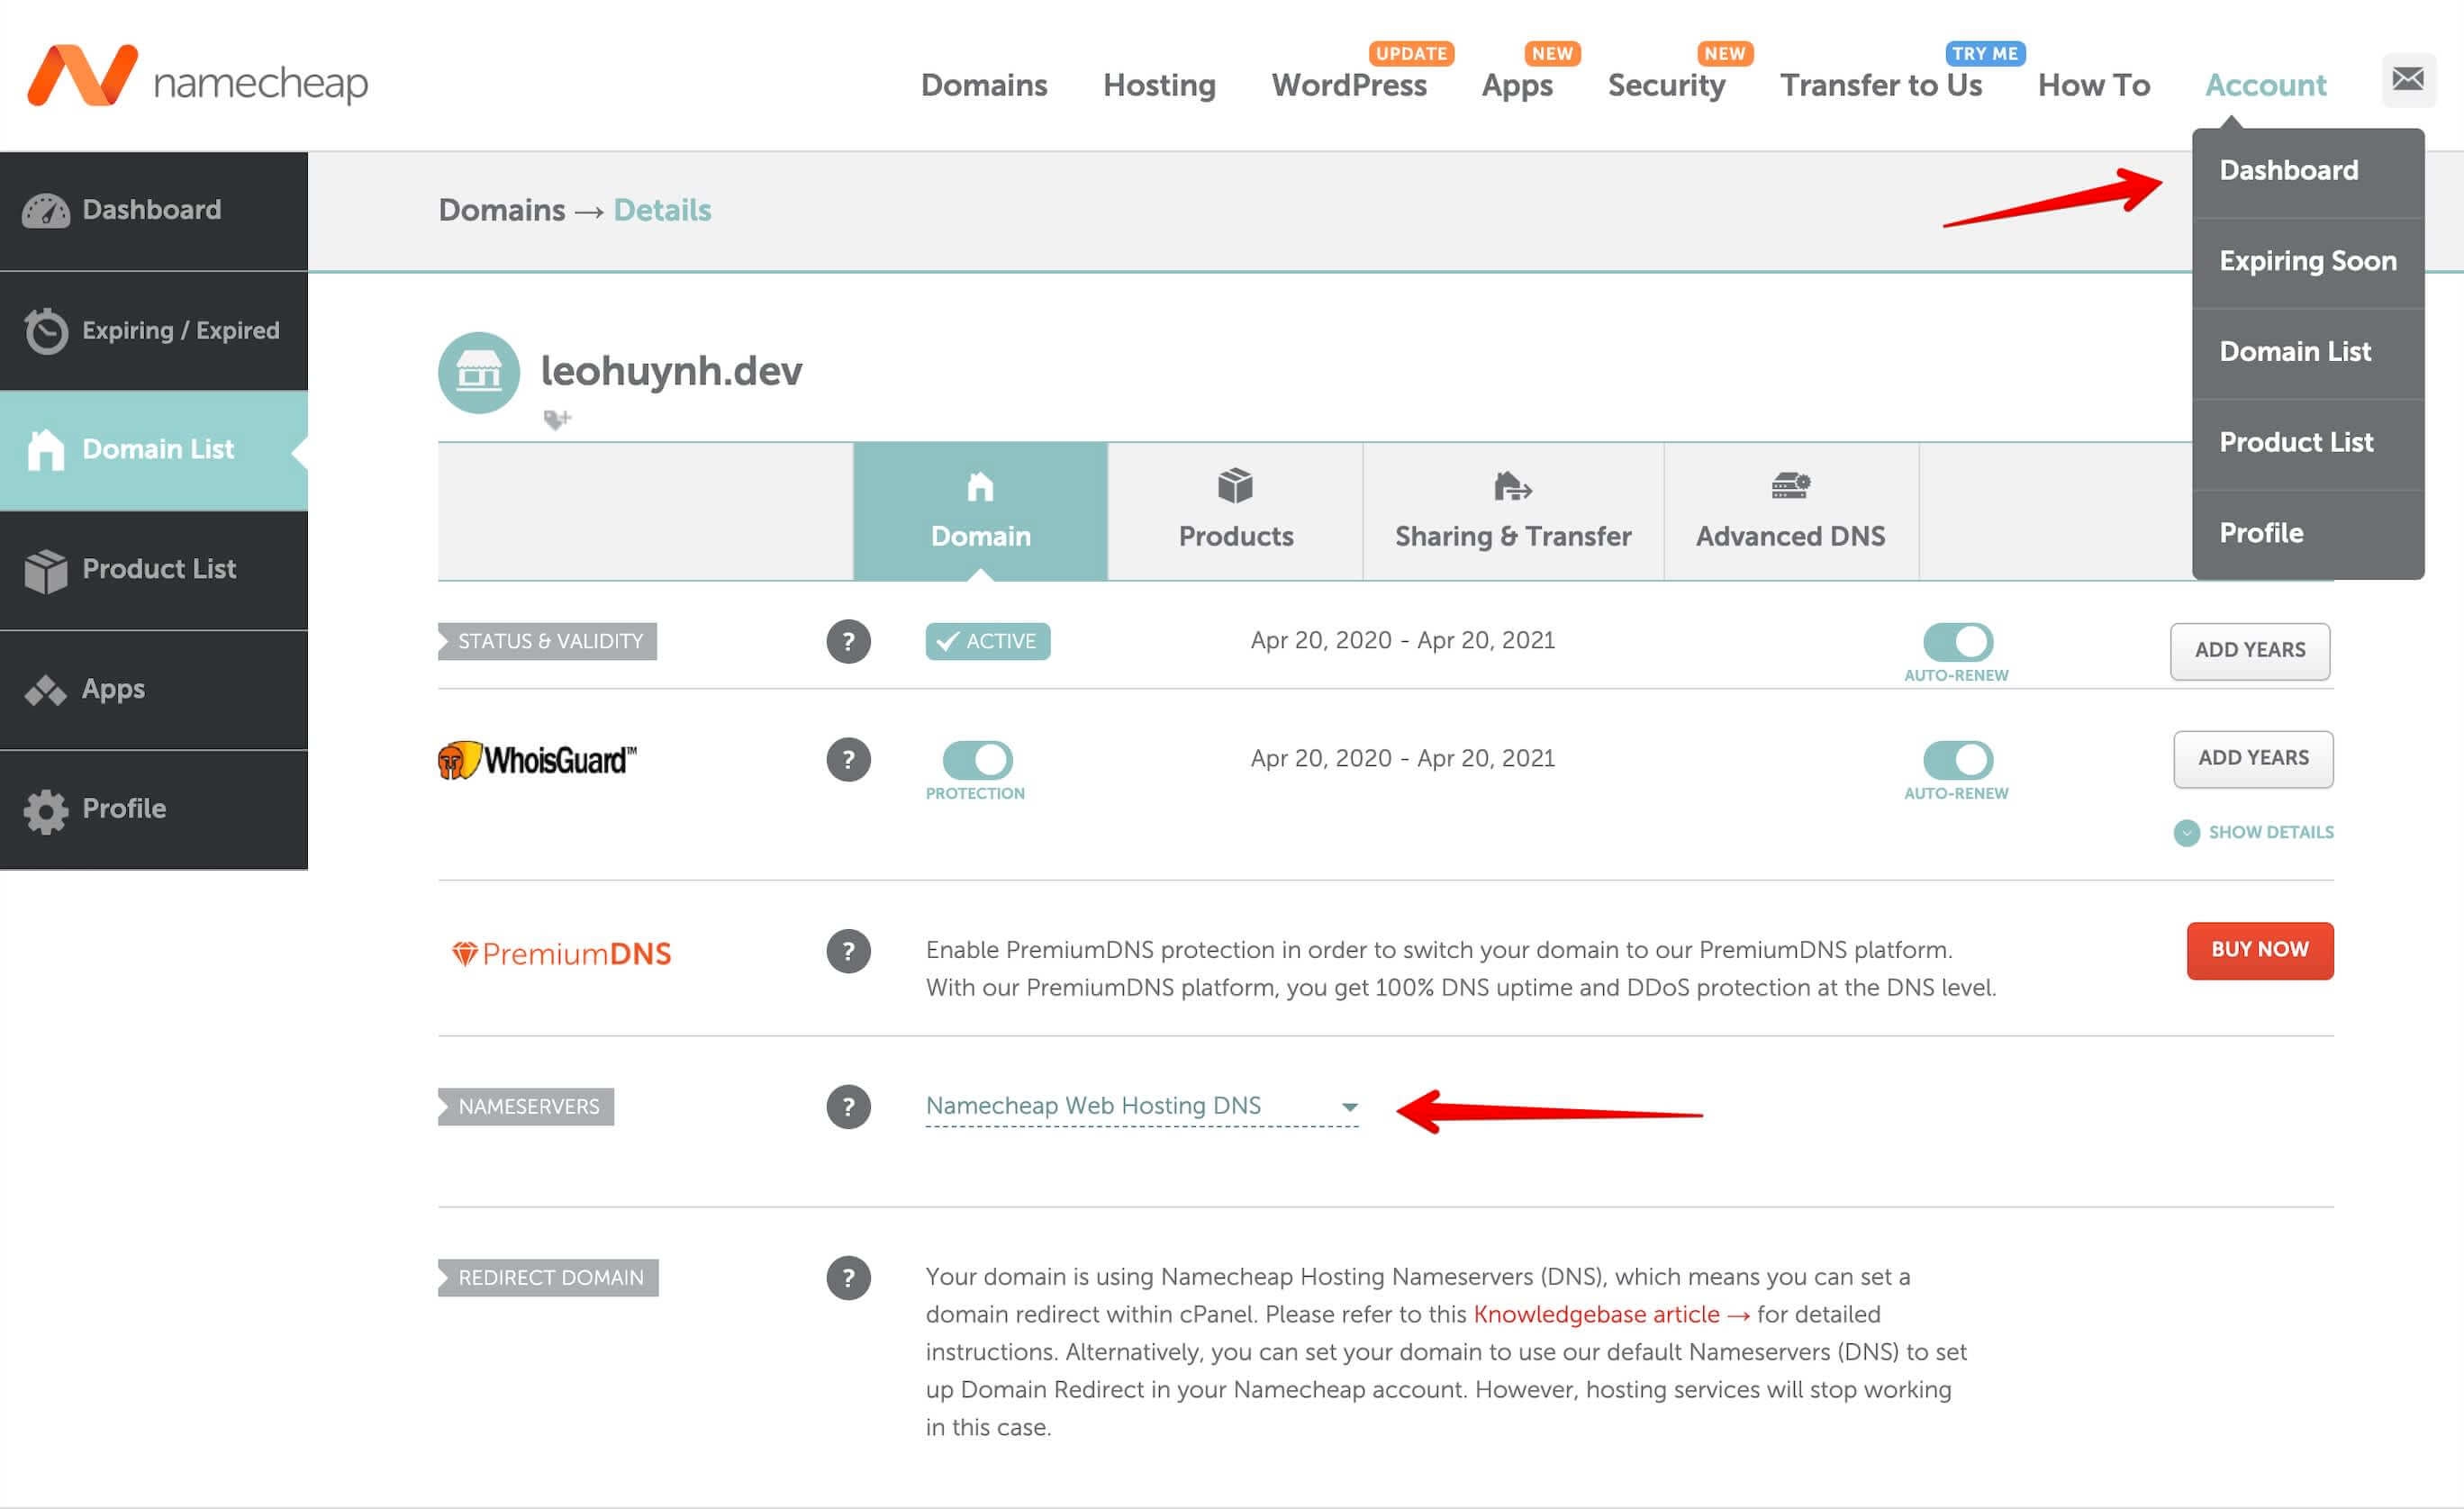
If you buy both domain and hosting on Namecheap, the configuration is quite easy:
- Go to Account / Dashboard / Domain List, click Manage on the domain you just bought.
- Select Namecheap Web Hosting DNS in the Nameservers section.
- Click save (the icon at the end of the line).
- Done.
Why can we access the website using domain name a simpler address ?
It’s all thanks to DNS (I won’t dive into this concept).
DNS (domain name system) is simply The Phone Book of the Internet. You can dial the number (IP Address) directly to call your crush (hosting), or look them up by name (domain) in your contact list.
Activate SSL Certificate
If you didn’t buy PositiveSSL, you can skip this section.
SSL (Secure Sockets Layer) is a security layer for your website, protecting it with HTTPS with two main purposes:
- Ensuring that the data going to and from your site is always encrypted.
- Verifying that the incoming and outgoing data is accurate.
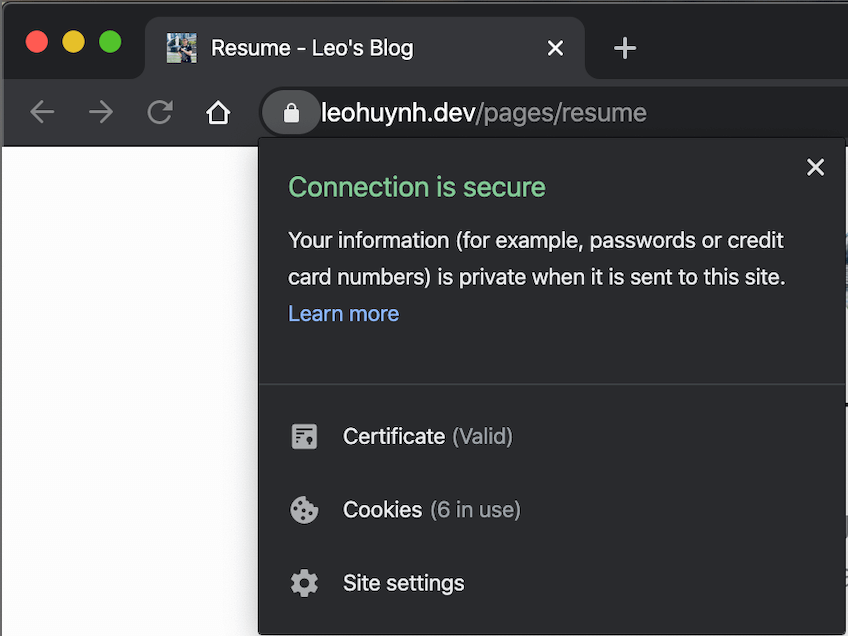
Websites with SSL Certificate are marked as Secured on browsers, ensuring user trust.
The simplest way to activate this is through cPanel on Namecheap:
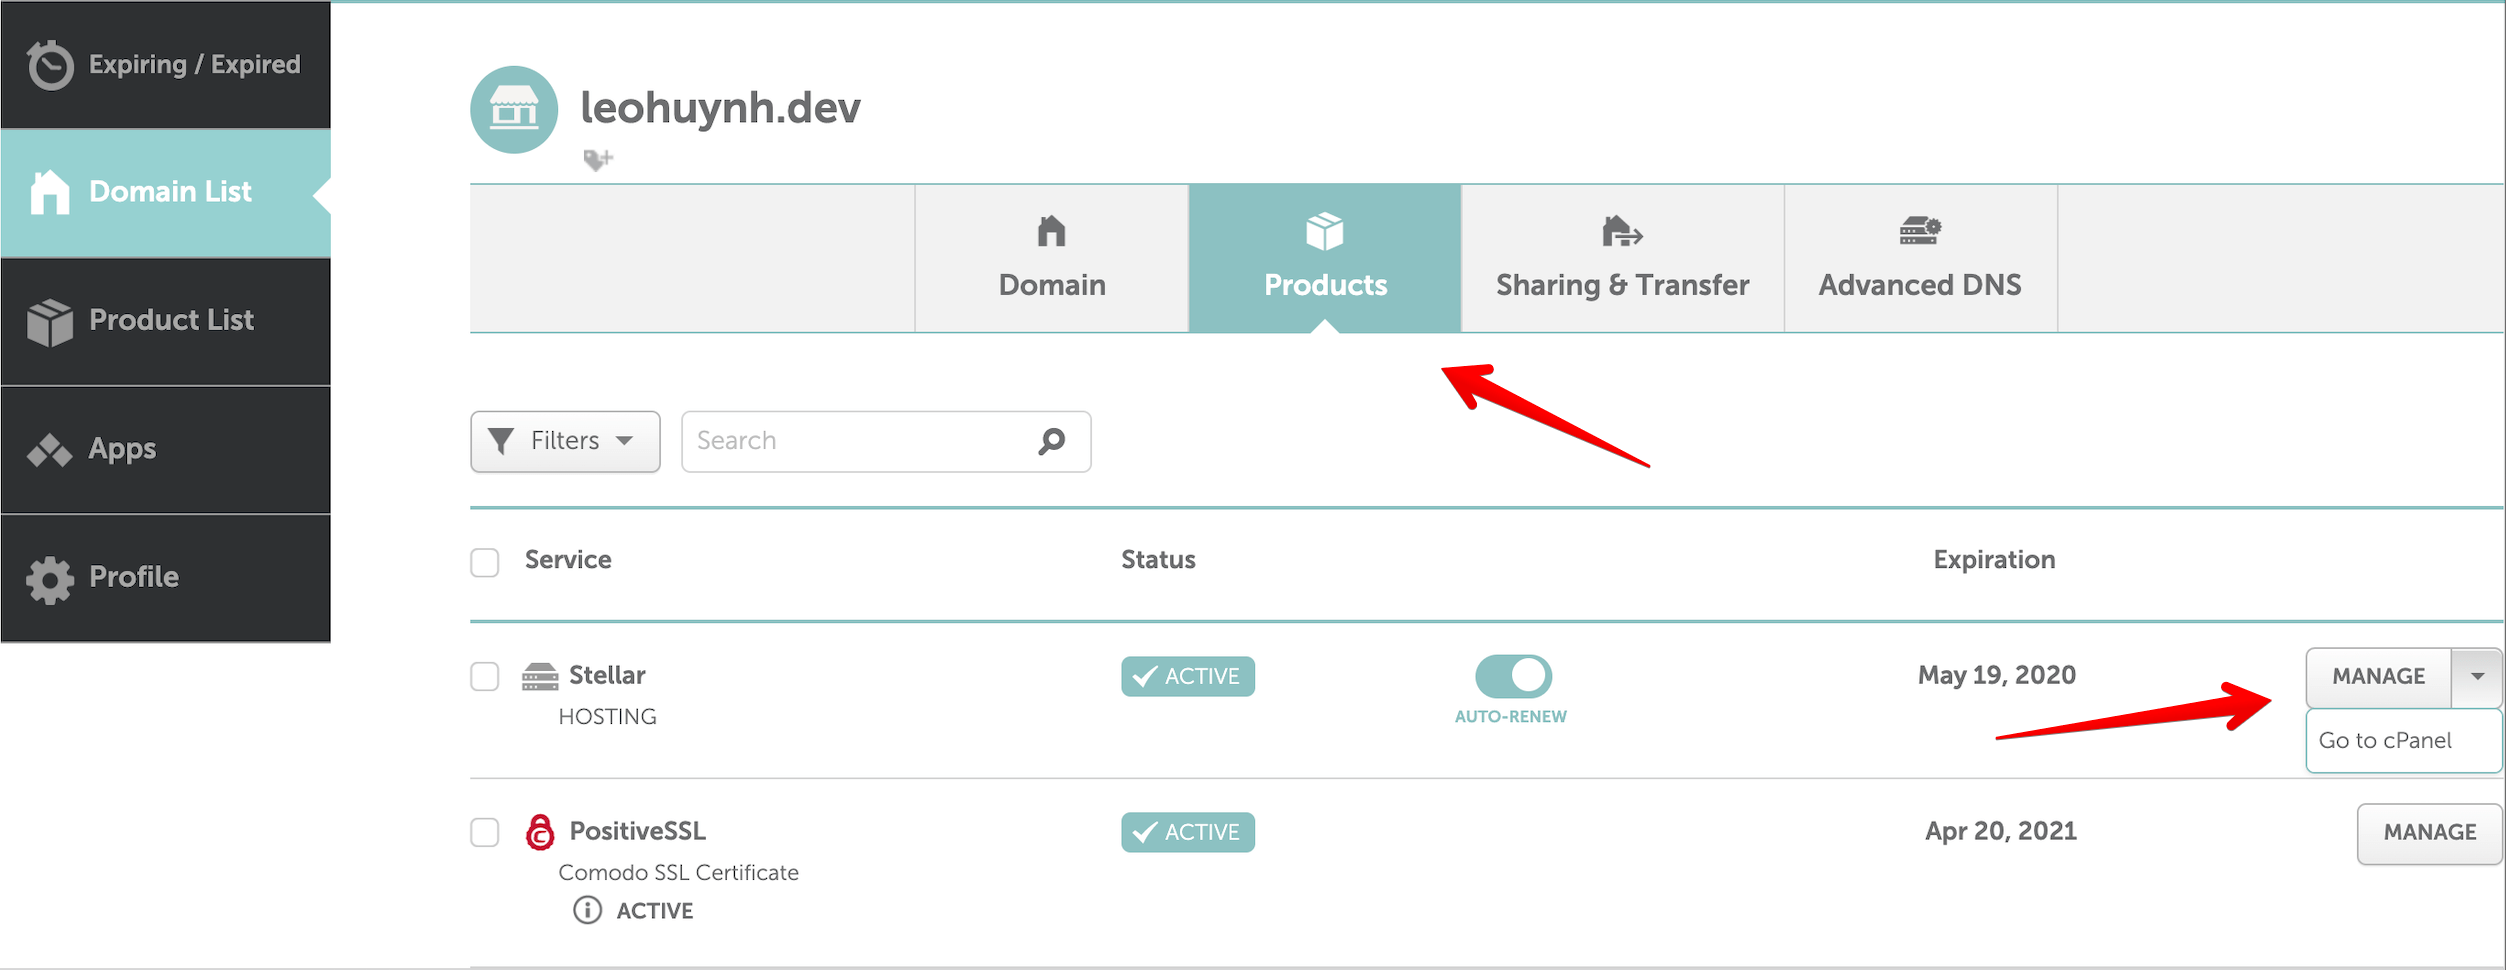
- Go to Account / Dashboard / Domain List, select the Products tab.
- Click Go to cPanel, log in with your Namecheap account.
- In cPanel, open Namecheap SSL.
- Click Activate PositiveSSL.
Wait for about 5-10 minutes, then click sync to see if it’s been successfully activated (if not, wait a bit more and sync again until the status changes to active).

Wrap Up
By now, you’ve completed 90% of your website setup , in the next part, I’ll guide you through the remaining 90% 10% , including:
- Understanding the folder structure on the server (web hosting).
- Using FileZilla to push code to the server.
- Setting up 2FA (Two-Factor Authentication) to enhance security.
Thanks a lot for reading , leave your thoughts in the comments below. Thank you so much!
