[Part 2] Deploy and configure your website on Namecheap in the simplest way

- Published on
- /4 mins read/---
In the previous part, I guided you through buying and connecting your domain to hosting, and activating the SSL Certificate.
In this part, I’ll show you how to push your code to the server and get your website live
What’s on the server ?
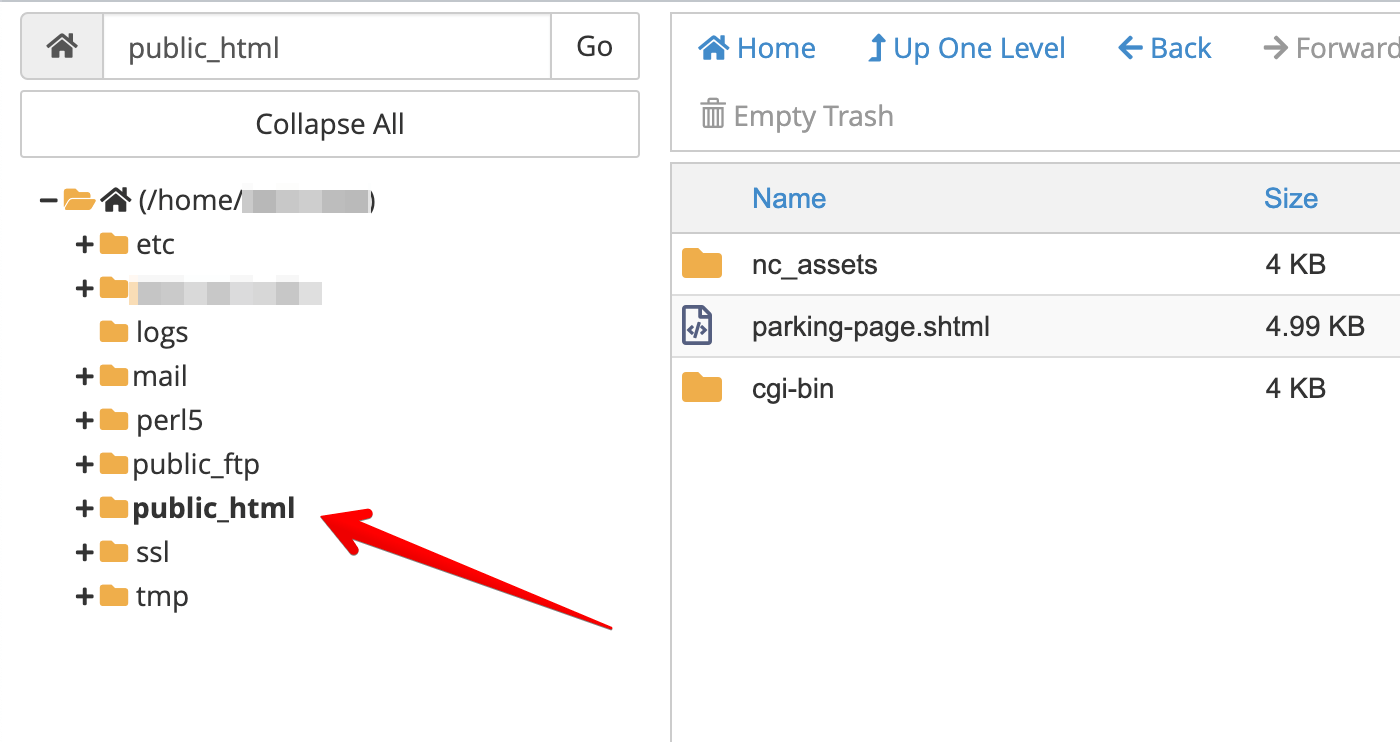
To understand the folder structure on the server, go to cPanel (I showed you how to access it in the previous post). Open File Manager in the Files section.

This is the folder structure on the server! By default, we’ll be in the root directory: /home/<cpanel-username>.
The folder we need to focus on is ./public_html, which contains all the source code (html, css, js) of the website. Our main goal is to put all the code files here.
File Manager allows direct upload of files but not folders . That’s why I use a tool Namecheap recommends, which is FileZilla.
Authorize FileZilla
FileZilla will connect and push the code to the server by accessing the server using FTP (File Transfer Protocol).
For a middle-man to help us upload files to the server, we need to grant access to that tool => Create an FTP Account, and FileZilla will use this account to upload code for us.
Creating an FTP Account is very simple:
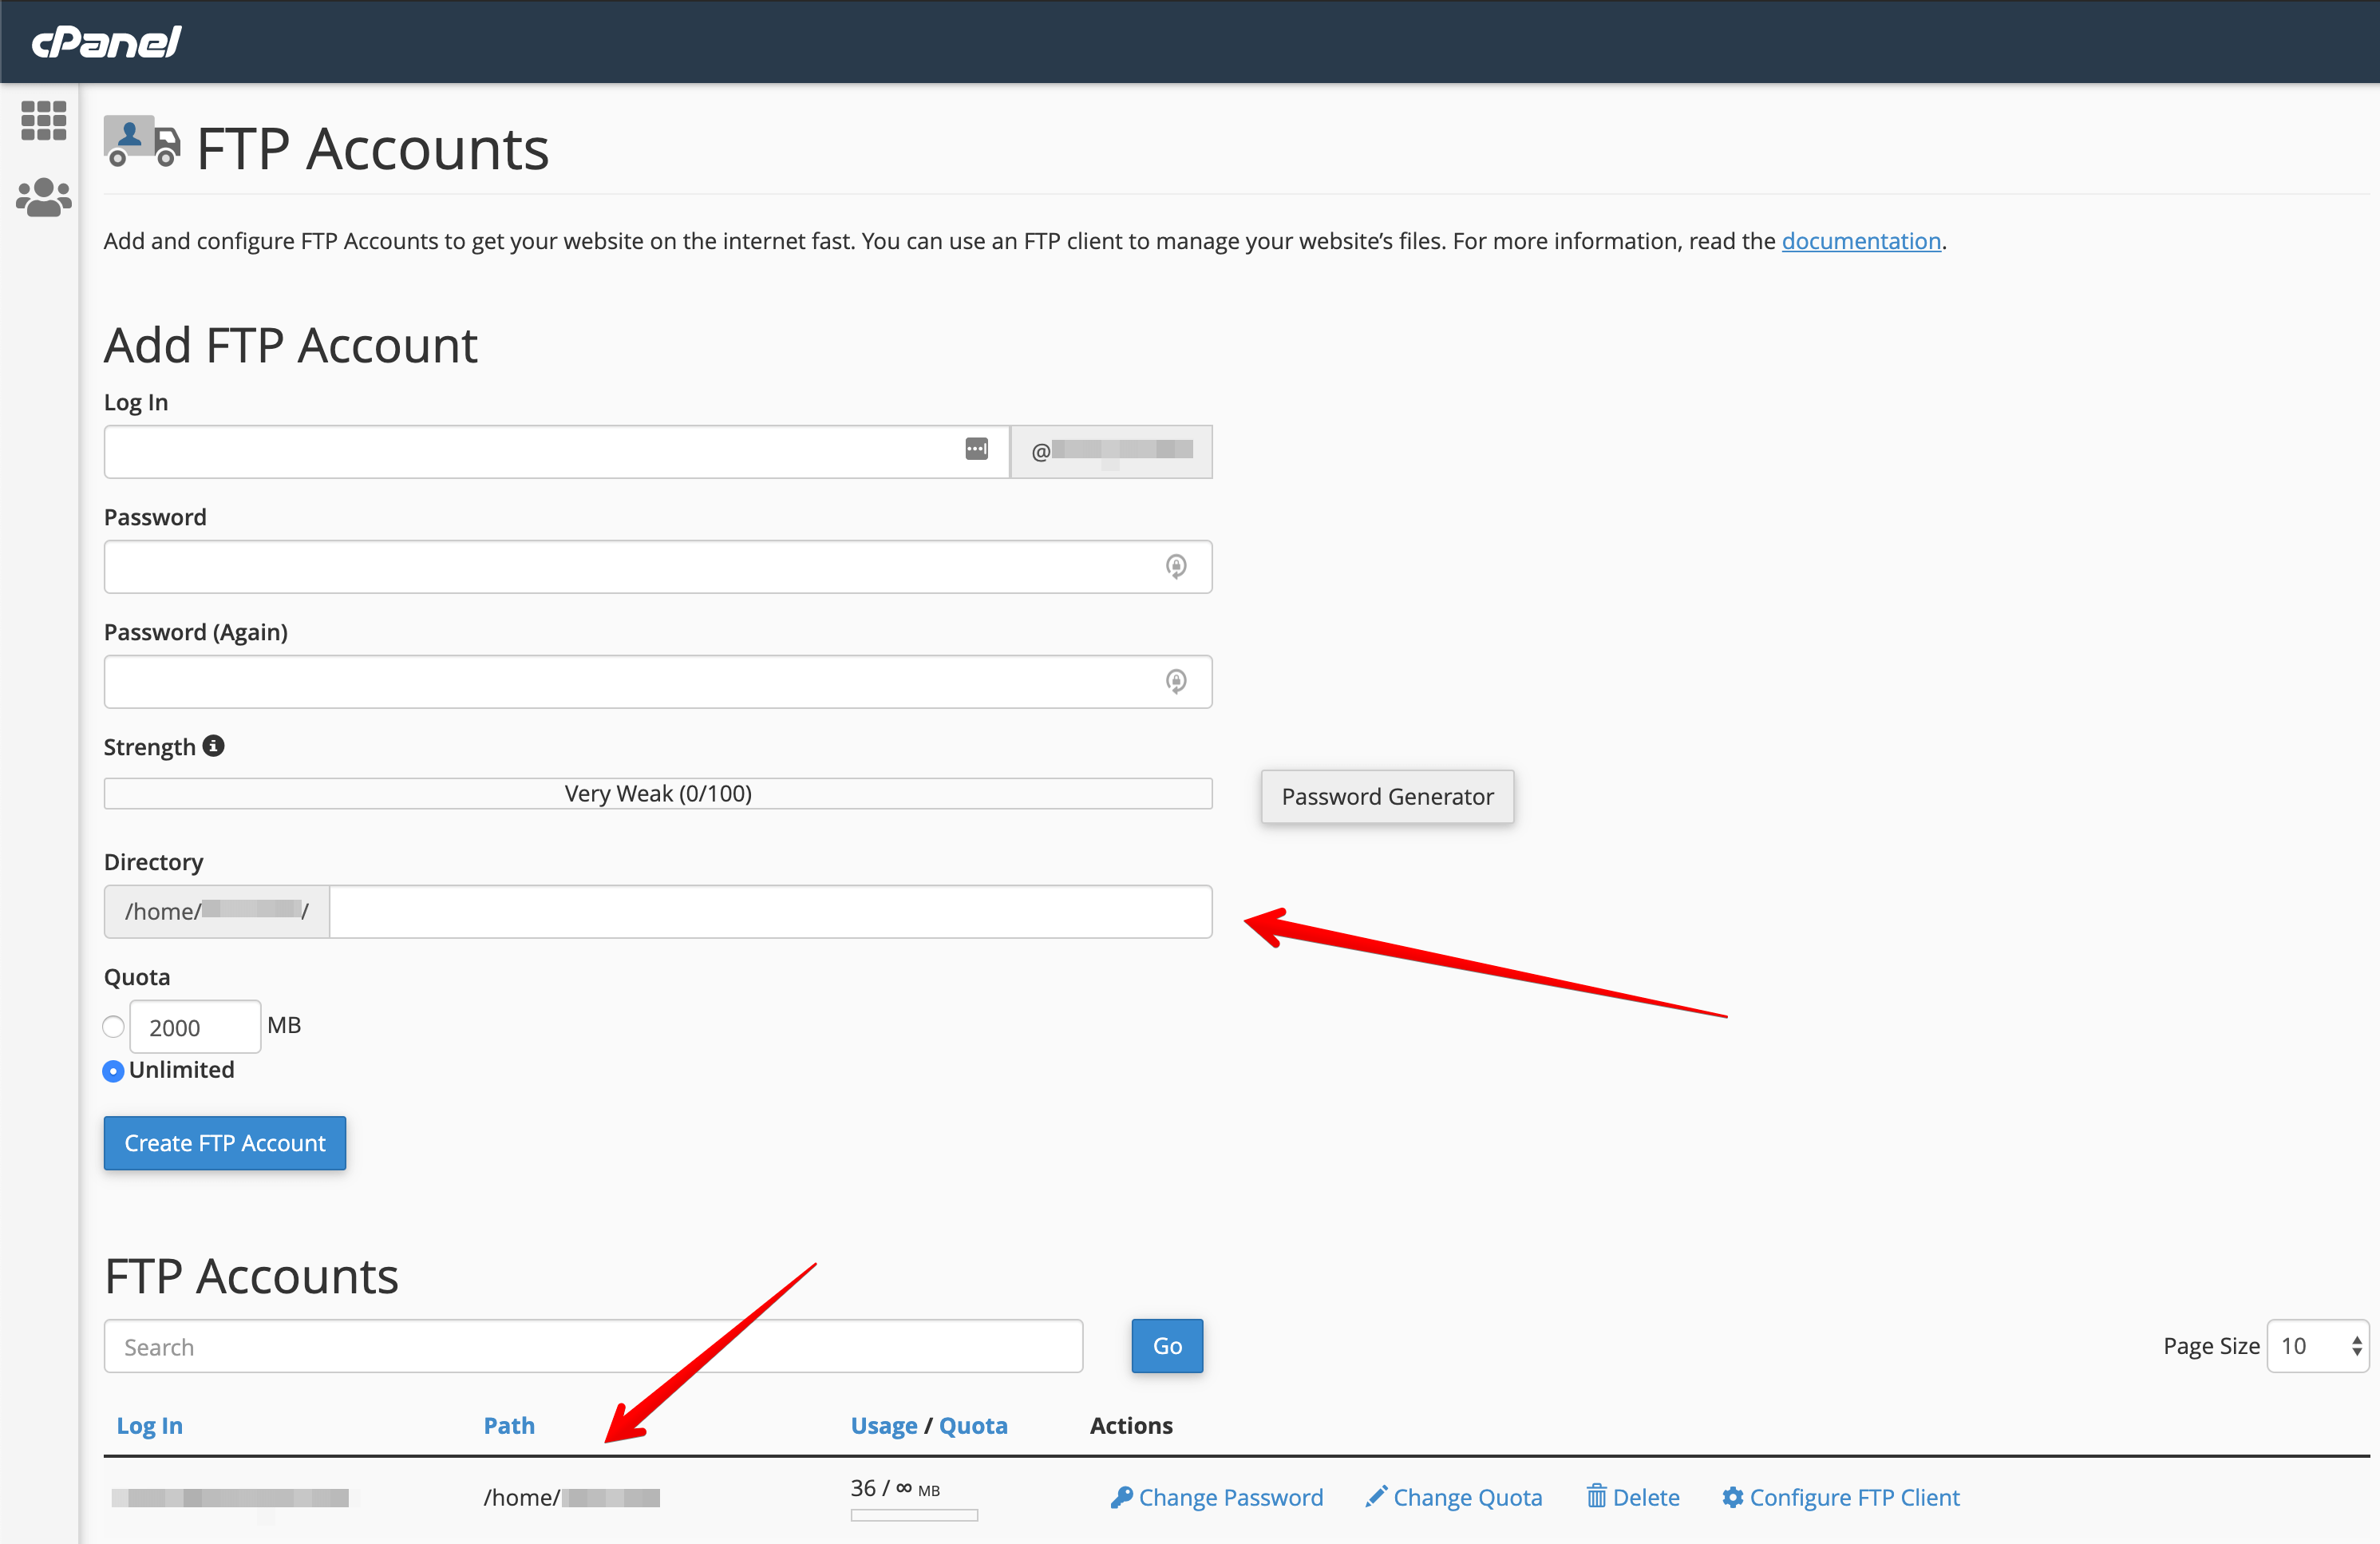
- Go to cPanel, click FTP Accounts in the Files section.
- Enter the username and password (don’t forget it ).

Note : When creating an FTP Account, make sure to set the access-directory of this account to the root-directory. Otherwise, this account won’t have access to the ./public_html folder
Setup FileZilla
After downloading and installing FileZilla, we will connect to the server using the FTP Account we just created.
Quick connect is the simplest way to connect to the server. You’ll need 4 pieces of information:
- Host name:
ftpes://<host-name>(don’t forget theftpes://prefix!)

(The host name is right at the URL in cPanel).
- Username: The FTP Account username you just created, in this format:
<ftp-account-name>@<your-domain> - Password
- Port: default is
21.
Enter all the information and click Quickconnect. You should see a successful signal to proceed.

(Don’t worry if you see the port disappear, FileZilla does that automatically )
Push code to the server
The complicated part is done , now it’s time to push your code to the server!

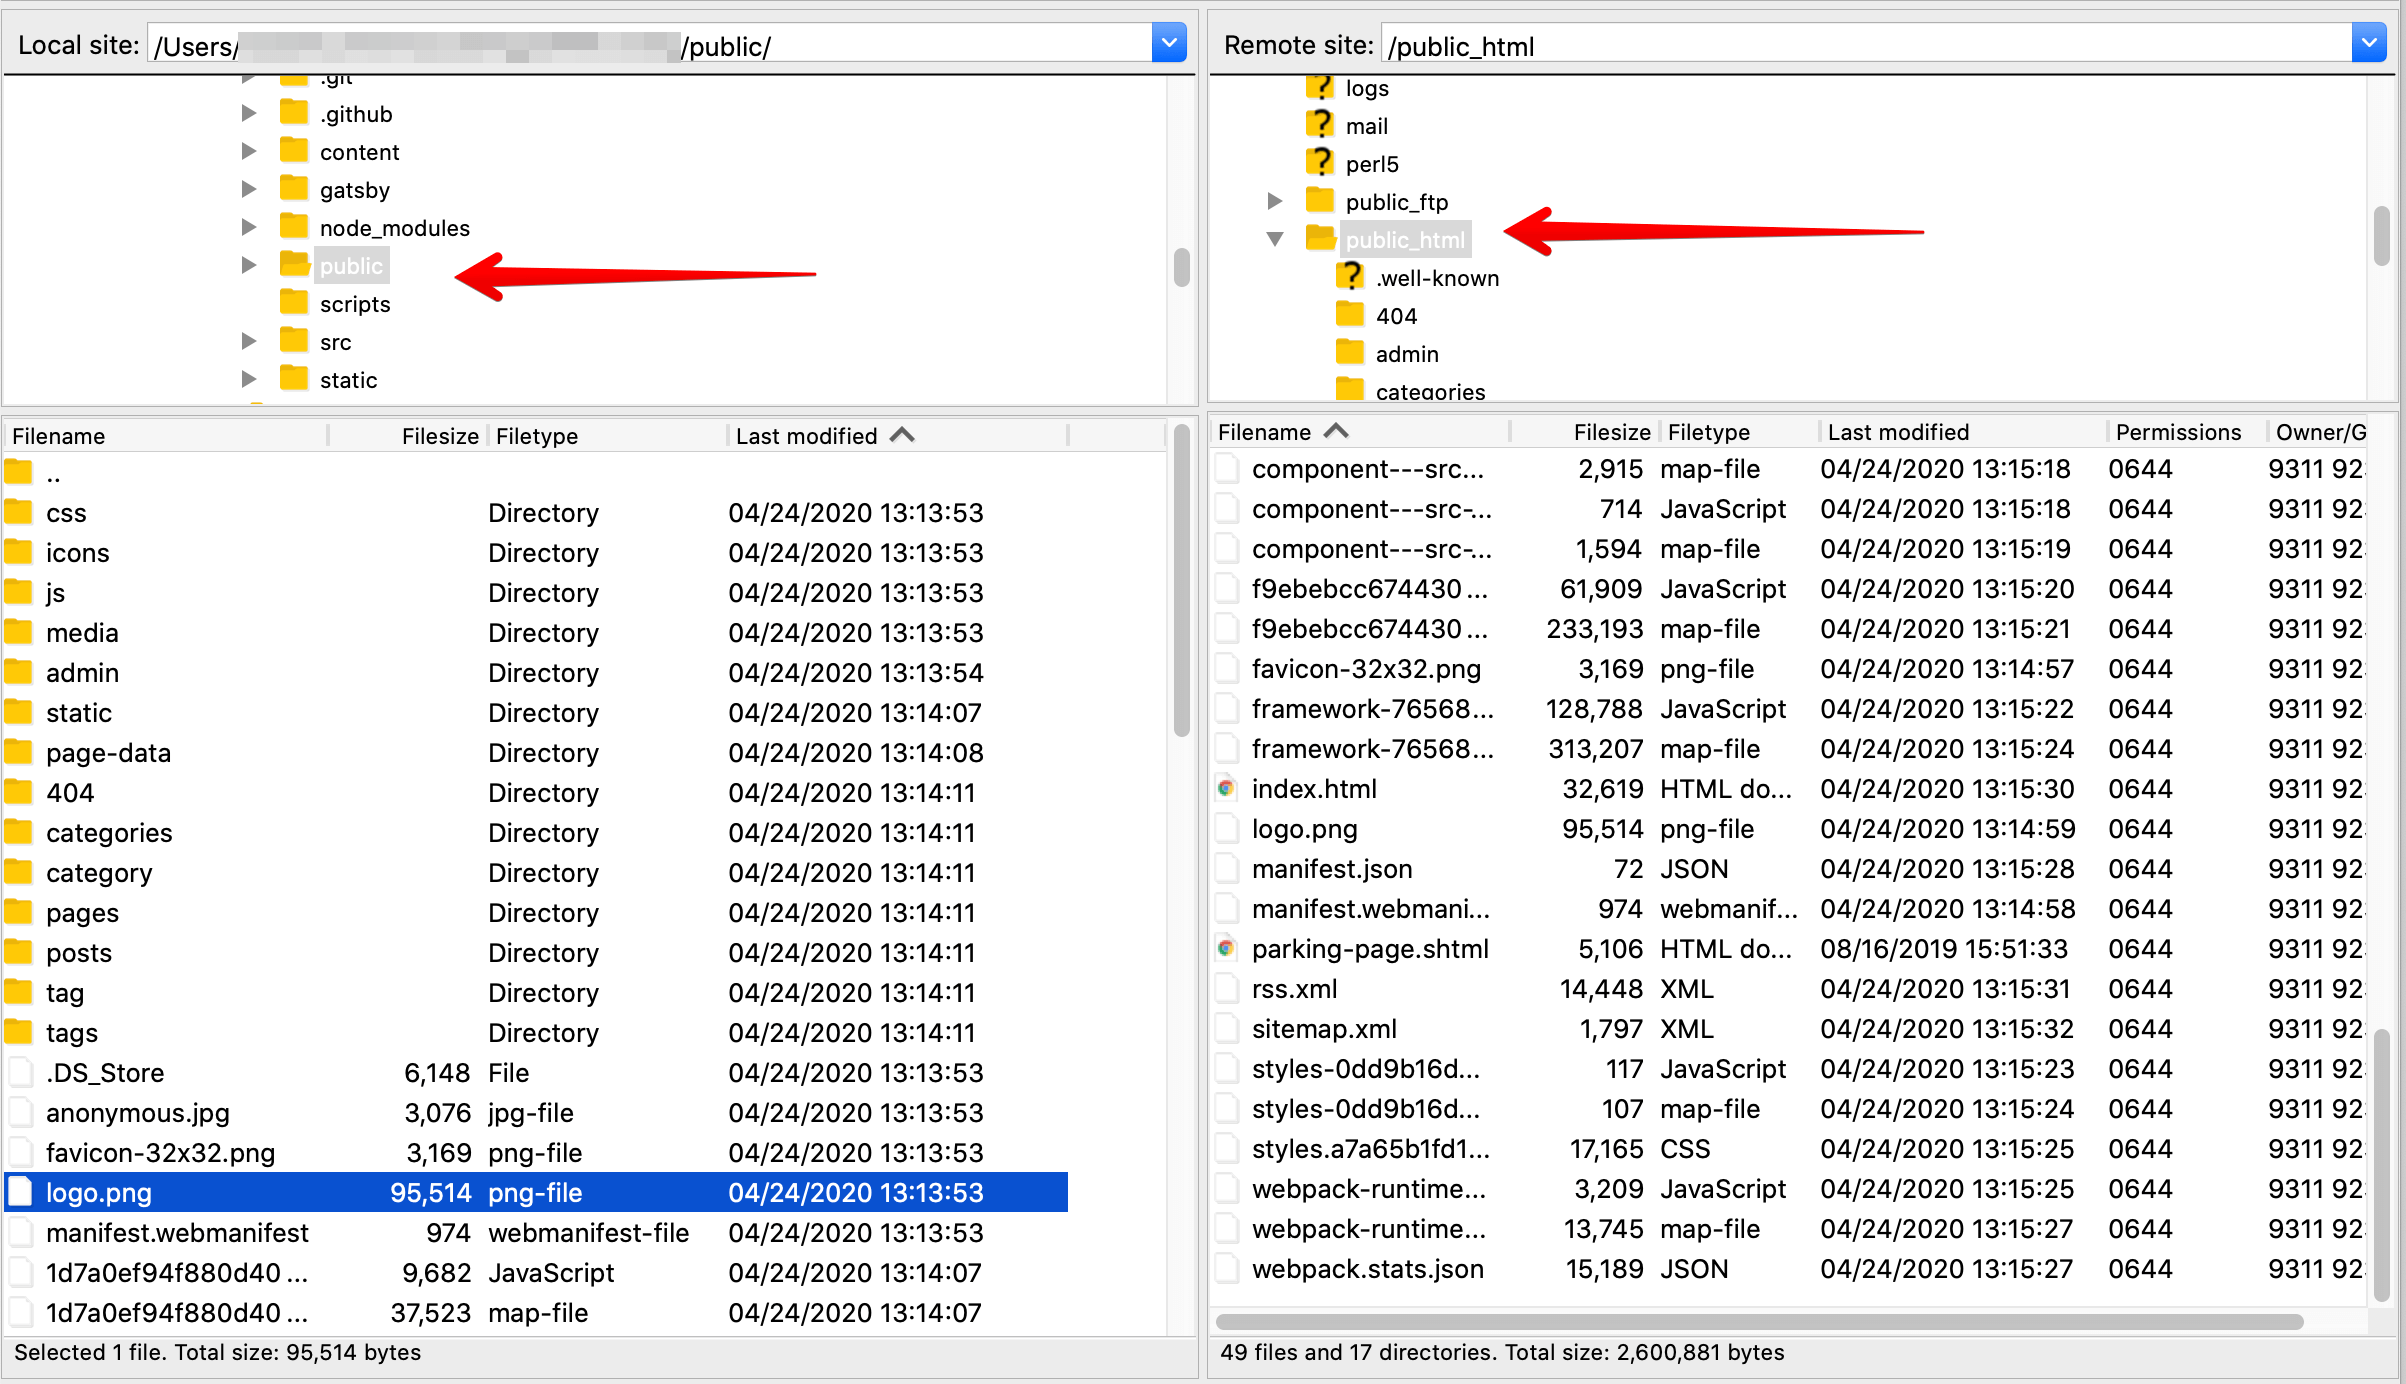
In FileZilla, there are 2 sections:
Local site: This contains all the folders on your machine. Navigate to the folder containing your code (make sure it’s the built code). In my case, it’s the
./publicfolder (it could be./build,./dist,./public... depending on your app configuration).Remote site: This shows all the folders on the server. Navigate to
./public_html.

Select all files in Local and drag them over to Remote ... and it’s done
Now just open your site, check the results, and fix typos if any

Two-Factor Authentication (Optional)
Two-Factor Authentication (2FA) is an additional security layer for your Namecheap account (you need to pass both layers to access your resources, so you won’t have to worry if your account gets compromised, since the second layer is on a separate device).
The first layer is your username/password, and the second layer can be one of the following:
- U2F (Universal 2nd Factor): Using a physical device like a key to unlock the account.
- TOTP (Time-based One-Time Password): Using a short-term password on another device via an Authentication app like: Google Authenticator, Authy ...
- Text Message Authentication: Using SMS on your phone.
I chose TOTP via the Google Authenticator app.
Download the app on your phone, then go to cPanel and open Two-Factor Authentication in the Security section, scan the QR Code, and you’re done!
From now on, Namecheap will ask for the TOTP code from the app whenever you log in to ensure security.
Wrap Up
I hope this tutorial helps you understand more about the server and how to host your own website.
If you don’t want to buy hosting, you can use other Free Hosting Services like: Github Page, Heroku, Netlify, Vercel ... (all of them support build tools and configuration, so you just need to connect your source code and you’re good to go).
Happy deploying!
